Choosing the right Bathtub Adapter starts with the connection, not the product photo. Measure the faucet outlet, identify its thread type, and check whether the spout is threaded or designed for a slip-on attachment. A mismatch can cause leaks, wobbling, or a frustrating return. Small details matter.
Industry research needs careful interpretation. The National Kitchen & Bath Association’s design reports examine broad bathroom trends, not adapter-specific performance or market statistics. They can provide useful renovation context, but they cannot prove that one adapter style fits every tub. Likewise, no source was provided here to verify a named Bathtub Adapter specialist’s quotation. Inventing a name or quote would weaken the advice rather than strengthen it.
Look for a clear compatibility chart, durable materials, and a secure sealing method. Compare the adapter’s stated dimensions with your faucet, then inspect the gasket and connection before installation. A hand-tight fit may still leak under water pressure. Check the manufacturer’s instructions.
There is no universal fit. That is the part many buying guides gloss over. If your faucet has an unusual shape, worn threads, or no removable outlet, pause and confirm compatibility with the manufacturer or a qualified plumbing professional. A few careful measurements can save a second purchase—and a wet bathroom floor.
Bathtub adapters generally fall into three groups: diverter spouts, add-on shower adapters, and threaded faucet adapters. A diverter spout replaces or upgrades the tub spout and redirects water upward when you pull its small lever. It suits a regular tub-and-shower setup, but the spout must match the pipe connection and reach. A threaded adapter attaches to compatible faucet threads, while an add-on adapter fits over a tub spout and connects to a handheld shower hose. These add-on styles can be convenient for rinsing, though some need a snug seal to prevent splashing.
Fit matters most. Check whether your spout has visible threads, a smooth slip-fit connection, or an aerator that can be removed. Measure the spout opening and note nearby handles or walls, since they can limit space for an adapter. Also check the stated water pressure and hose connection size. Rubber washers help reduce leaks, but a washer cannot fix mismatched threads. A “universal” label may sound reassuring; still, it is worth comparing measurements before buying. I have seen small fit details cause more trouble than the adapter type itself. Keep the old parts nearby during installation, and stop if the connection feels forced. A tight fit should not require guesswork.

Understanding the Different Types of Bathtub Adapters
Common tub-spout connections include 1/2-inch slip-fit copper and 1/2- or 3/4-inch threaded pipe. Choose an adapter that matches both the connection type and nominal pipe size. Nominal size is a plumbing designation, not a direct measurement of the pipe’s outside diameter, so check the existing pipe and the adapter’s specifications before buying.
How to Choose the Right Bathtub Adapter?
Measuring Your Faucet and Tub for a Proper Fit
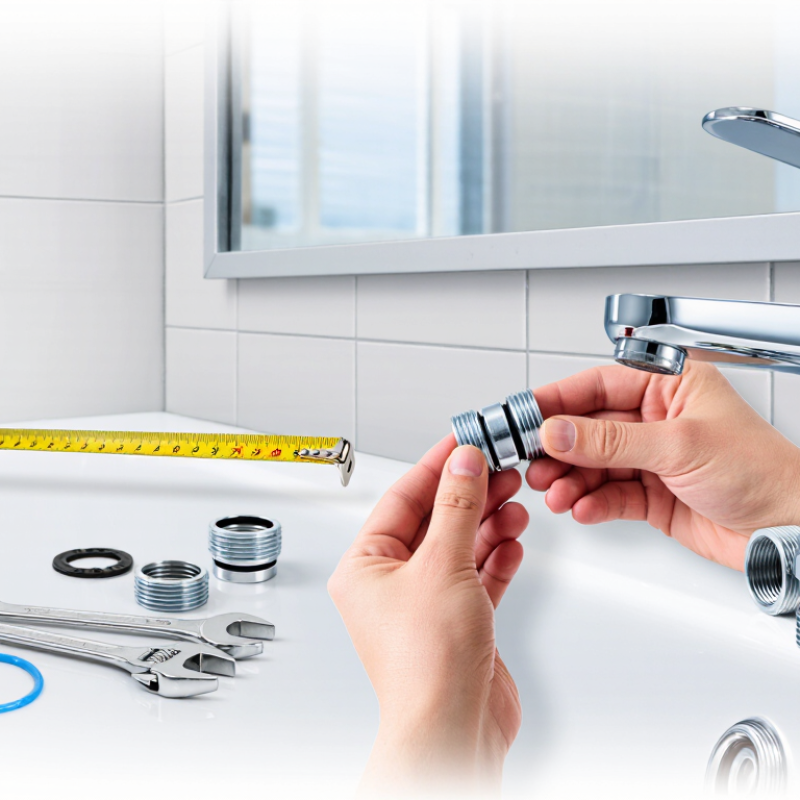
A bathtub adapter should match your faucet, tub edge, and water outlet. Measure before buying. I once assumed a standard faucet would fit, but the spout was shorter than expected. The adapter could not grip securely. Measure the faucet’s length from the wall to the outlet. Then measure its diameter and check for threads, grooves, or a smooth opening. Small differences matter.
Tips: Use a ruler with millimeter markings. Measure twice, especially around curved surfaces. Check the distance from the faucet outlet to the tub floor. Leave enough room for the adapter hose to bend without sharp kinks. Also inspect the tub rim. A narrow rim may need a compact design, while a wider rim may require a longer connector. Take a clear photo of the faucet end for comparison.
Before installation, clean mineral buildup from the faucet. A dirty surface can cause leaks or weak suction. Test the adapter by hand before tightening anything. It should feel stable, not forced. If water sprays sideways, stop and recheck the seal. Some measurements can be misleading when old fittings are worn. That is worth remembering. A flexible washer may improve contact, but it cannot correct a completely mismatched size. Choose a model with compatible fittings and follow its installation instructions carefully.
| What to Check | How to Measure or Identify It | What the Measurement Tells You | Fit Considerations |
|---|---|---|---|
| Faucet or tub-spout type | Look underneath the tub spout near the wall. A small set screw usually indicates a slip-fit spout; no set screw may indicate a threaded connection. Check the faucet or adapter instructions if the connection is hidden. | Identifies the connection style you need to match before choosing an adapter. | Slip-fit and threaded connections are not interchangeable. Do not assume an adapter will fit based on appearance alone. |
| Thread size and type | If the spout has a removable threaded outlet or connection, measure its outside diameter and count the threads over one inch. Use a thread gauge when possible; record whether the threads are inside or outside. | Helps match the adapter’s listed thread diameter, thread pitch, and gender. | Common tub-spout connections include 1/2-inch connections, but sizes and thread standards vary. Match the exact specifications; diameter alone is not enough. |
| Spout outlet shape and diameter | Measure across the outlet opening at its widest point. Note whether it is round, threaded, smooth, or fitted with an aerator or screen. | Shows whether the adapter is designed to attach to that outlet style. | Many tub spouts do not have a standard faucet aerator thread. An aerator adapter may not fit a tub spout, even if the outlet looks similar. |
| Spout reach from the wall | Measure from the finished wall surface to the center of the water outlet. | Helps confirm where water will land in the tub and whether an added adapter will project too far. | Check the adapter’s added length and keep the water stream directed into the tub, not onto the rim or floor. |
| Distance above the tub rim | Measure vertically from the top of the tub rim to the underside of the spout outlet. | Indicates the available clearance for attaching and removing the adapter. | Allow enough room to install the adapter securely without it contacting the tub or obstructing the water flow. |
| Diverter operation | Check whether the spout has a pull-up knob, a lever, or another diverter control that sends water to a shower. | Identifies whether the adapter must work with the existing diverter arrangement. | Do not block or interfere with the diverter. Follow the adapter instructions for use with diverter spouts. |
| Adapter sealing surface | Inspect the outlet and adapter for a flat washer seat, gasket, or specified sealing method. | Helps determine how the connection is intended to prevent leaks. | Use the supplied gasket or seal as directed. Do not force mismatched threads or overtighten plastic fittings. |
| Before ordering | Write down the connection type, thread details, outlet diameter, spout reach, and rim clearance. Compare those measurements with the adapter’s published specifications. | Provides a practical checklist for confirming compatibility. | Measurements and connection standards can vary by fixture. When uncertain, consult the faucet or adapter installation instructions or a qualified plumbing professional. |
Choosing the right bathtub adapter begins with your existing plumbing, not the adapter’s appearance. Check whether the tub spout uses a threaded connection or slides over a smooth pipe. Thread direction matters too. A female adapter needs matching male threads, while a slip-fit model may require a set screw.
Measure the exposed pipe carefully. Record its diameter, length, and material. Even a few millimeters can cause poor alignment or hidden leaks. Inspect the pipe for rust, damaged threads, or mineral buildup. Clean threads help the seal work properly. Do not rely on guesswork.
Water pressure also deserves attention. An adapter designed for a narrow outlet may restrict flow or create unwanted spray. Confirm that its internal opening suits your plumbing system. Use a suitable sealing method for threaded joints, but avoid excessive sealant. Too much can enter the pipe and affect the diverter.
Test the connection slowly. Watch the joint while switching between the tub outlet and shower line. Dry paper placed beneath the connection can reveal small leaks quickly. This simple check is useful.
I once trusted a tight hand connection and missed a slow drip until the surrounding area stayed damp.
If the pipe disappears into the wall, stop before forcing it. A qualified plumber can inspect concealed fittings and prevent a small mismatch from becoming water damage.
How to Choose the Right Bathtub Adapter?
Material choice affects durability, sealing, and cleaning effort. Solid brass handles frequent temperature changes and repeated tightening well. Stainless steel resists surface corrosion, especially in humid bathrooms. ABS or nylon can reduce cost and weight, but stressed threads may wear sooner. A rubber washer remains essential. Without it, even a strong metal adapter can drip.
Features should match the faucet, not just the bathroom’s appearance. Check thread size, connection direction, and clearance around the spout. A swivel joint helps align the hose without twisting it. A diverter should move firmly and stop water completely. The U.S. EPA WaterSense specification limits showerhead flow to 2.0 gallons per minute, compared with the federal maximum of 2.5 gallons. An adapter with an efficient head can therefore reduce water use, though actual savings depend on household habits.
Maintenance is often underestimated. Remove mineral buildup monthly with diluted white vinegar, if the manufacturer permits it. Rinse the threads and inspect the washer for flattening or cracks. Avoid forcing a stuck connector; hand-tightening followed by a small wrench adjustment is safer. I have seen polished finishes hide early corrosion around the seal. That detail deserves attention. The 2023 National Association of Home Builders remodeling research also shows that bathroom upgrades remain common, but replacement decisions should include long-term upkeep, not appearance alone. A cheaper adapter may become expensive after repeated washer and thread failures.
A bathtub adapter should match your faucet’s outlet, thread type, and water pressure. Measure the outlet before buying anything. Some faucets use internal threads, while others use external threads.
An adapter that looks close may still leak badly. Check whether the faucet has a removable aerator or a built-in diverter. This small detail changes the installation method.
Brass or reinforced stainless steel usually offers better durability than thin plastic. However, material alone does not guarantee a good fit.
Turn off the water and clean the faucet threads with a soft cloth. Remove the old aerator gently. Do not force it with sharp tools. Wrap approved thread-sealing tape around compatible male threads, keeping the tape away from the opening. Place the supplied rubber washer inside the adapter. Tighten it by hand first, then use a wrench for a small final turn.
Excessive force can damage the faucet or crush the washer.
Open the water slowly. Watch the connection closely. Test both the faucet and the attached hose, if included. Run water for about one minute, then touch the joint with a dry tissue.
A tiny wet mark reveals a slow leak more clearly than eyesight.
If water escapes, shut it off and inspect the washer. I once assumed a loose connection caused leaking, but the washer was slightly twisted. That mistake was easy to miss.
Check spray direction and water pressure before regular use. A sudden spray can wet the floor or nearby electrical fixtures.
Recheck the adapter after several uses, because new seals may settle.